Starting your first diamond painting can feel a little intimidating. You’ve got a rolled canvas, a pile of tiny resin drills, and some tools that don’t look very familiar. But once you know how to set yourself up and take it step by step, the whole paint with diamonds process becomes relaxing, and actually very easy.
What’s Inside a Diamond Painting Kit
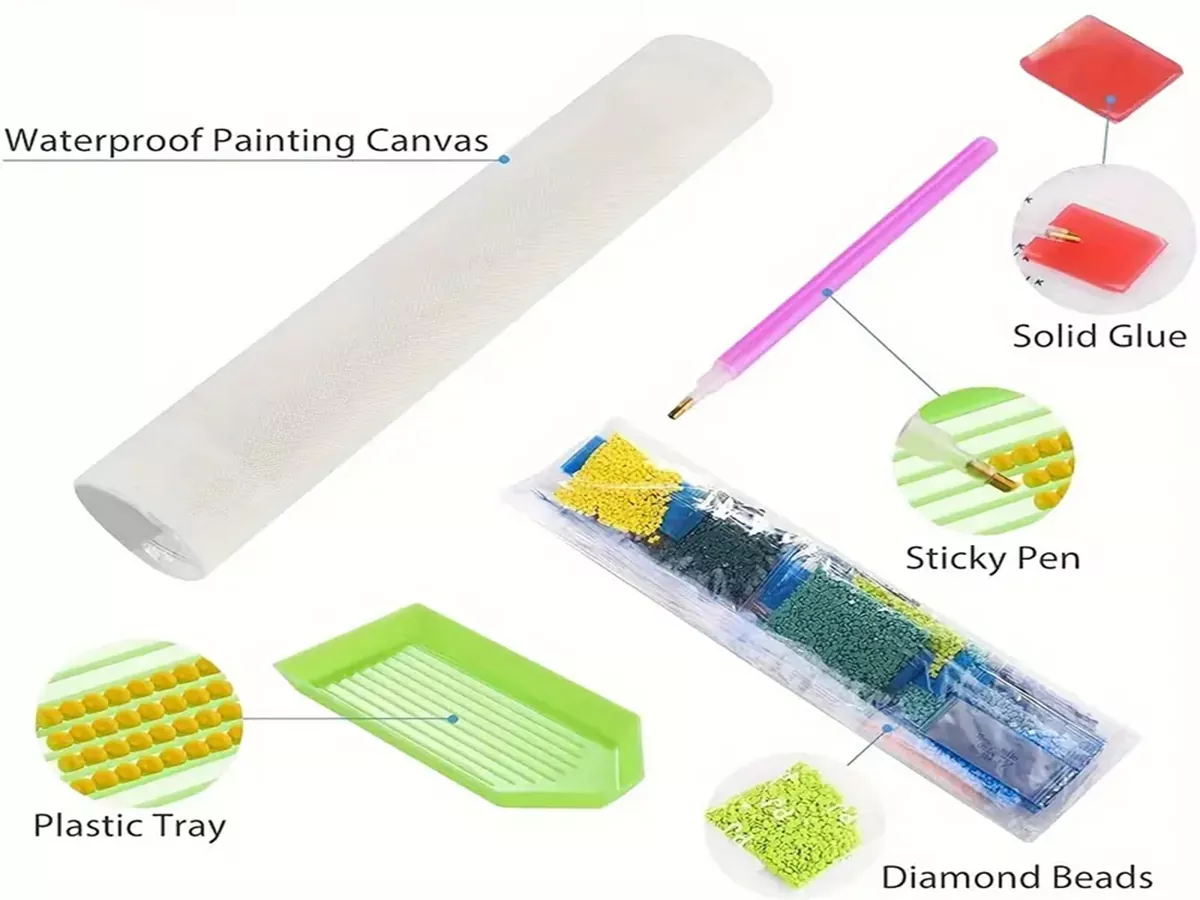
Every kit comes with the essentials needed to complete the project. While sizes and designs vary, most kits should include:
- A pre-printed adhesive canvas with symbols
- Packets of colorful resin drills (diamonds)
- An applicator pen
- A wax pad to help the pen pick up drills
- A tray for sorting and organizing drills
Check the contents carefully before starting. Confirming that all drills and tools are present avoids frustration later in the process.
Preparing the Workspace
A clean, flat, and well-lit surface is the best place to begin. Natural daylight works beautifully, though a bright lamp is just as effective. If the canvas arrives curled, flatten it under a stack of books for a few hours to make working easier.
Organizing drills at this stage pays off later. Many painters transfer them into small containers or resealable bags labeled by number or symbol, which makes the process smoother and prevents color mix-ups.
Beginning the Painting
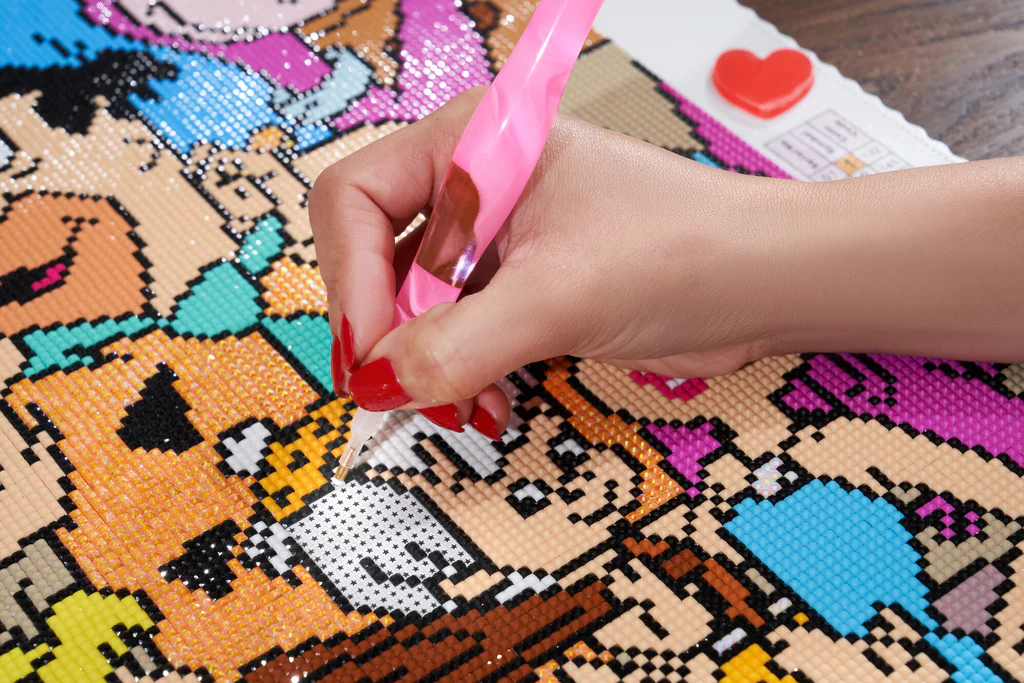
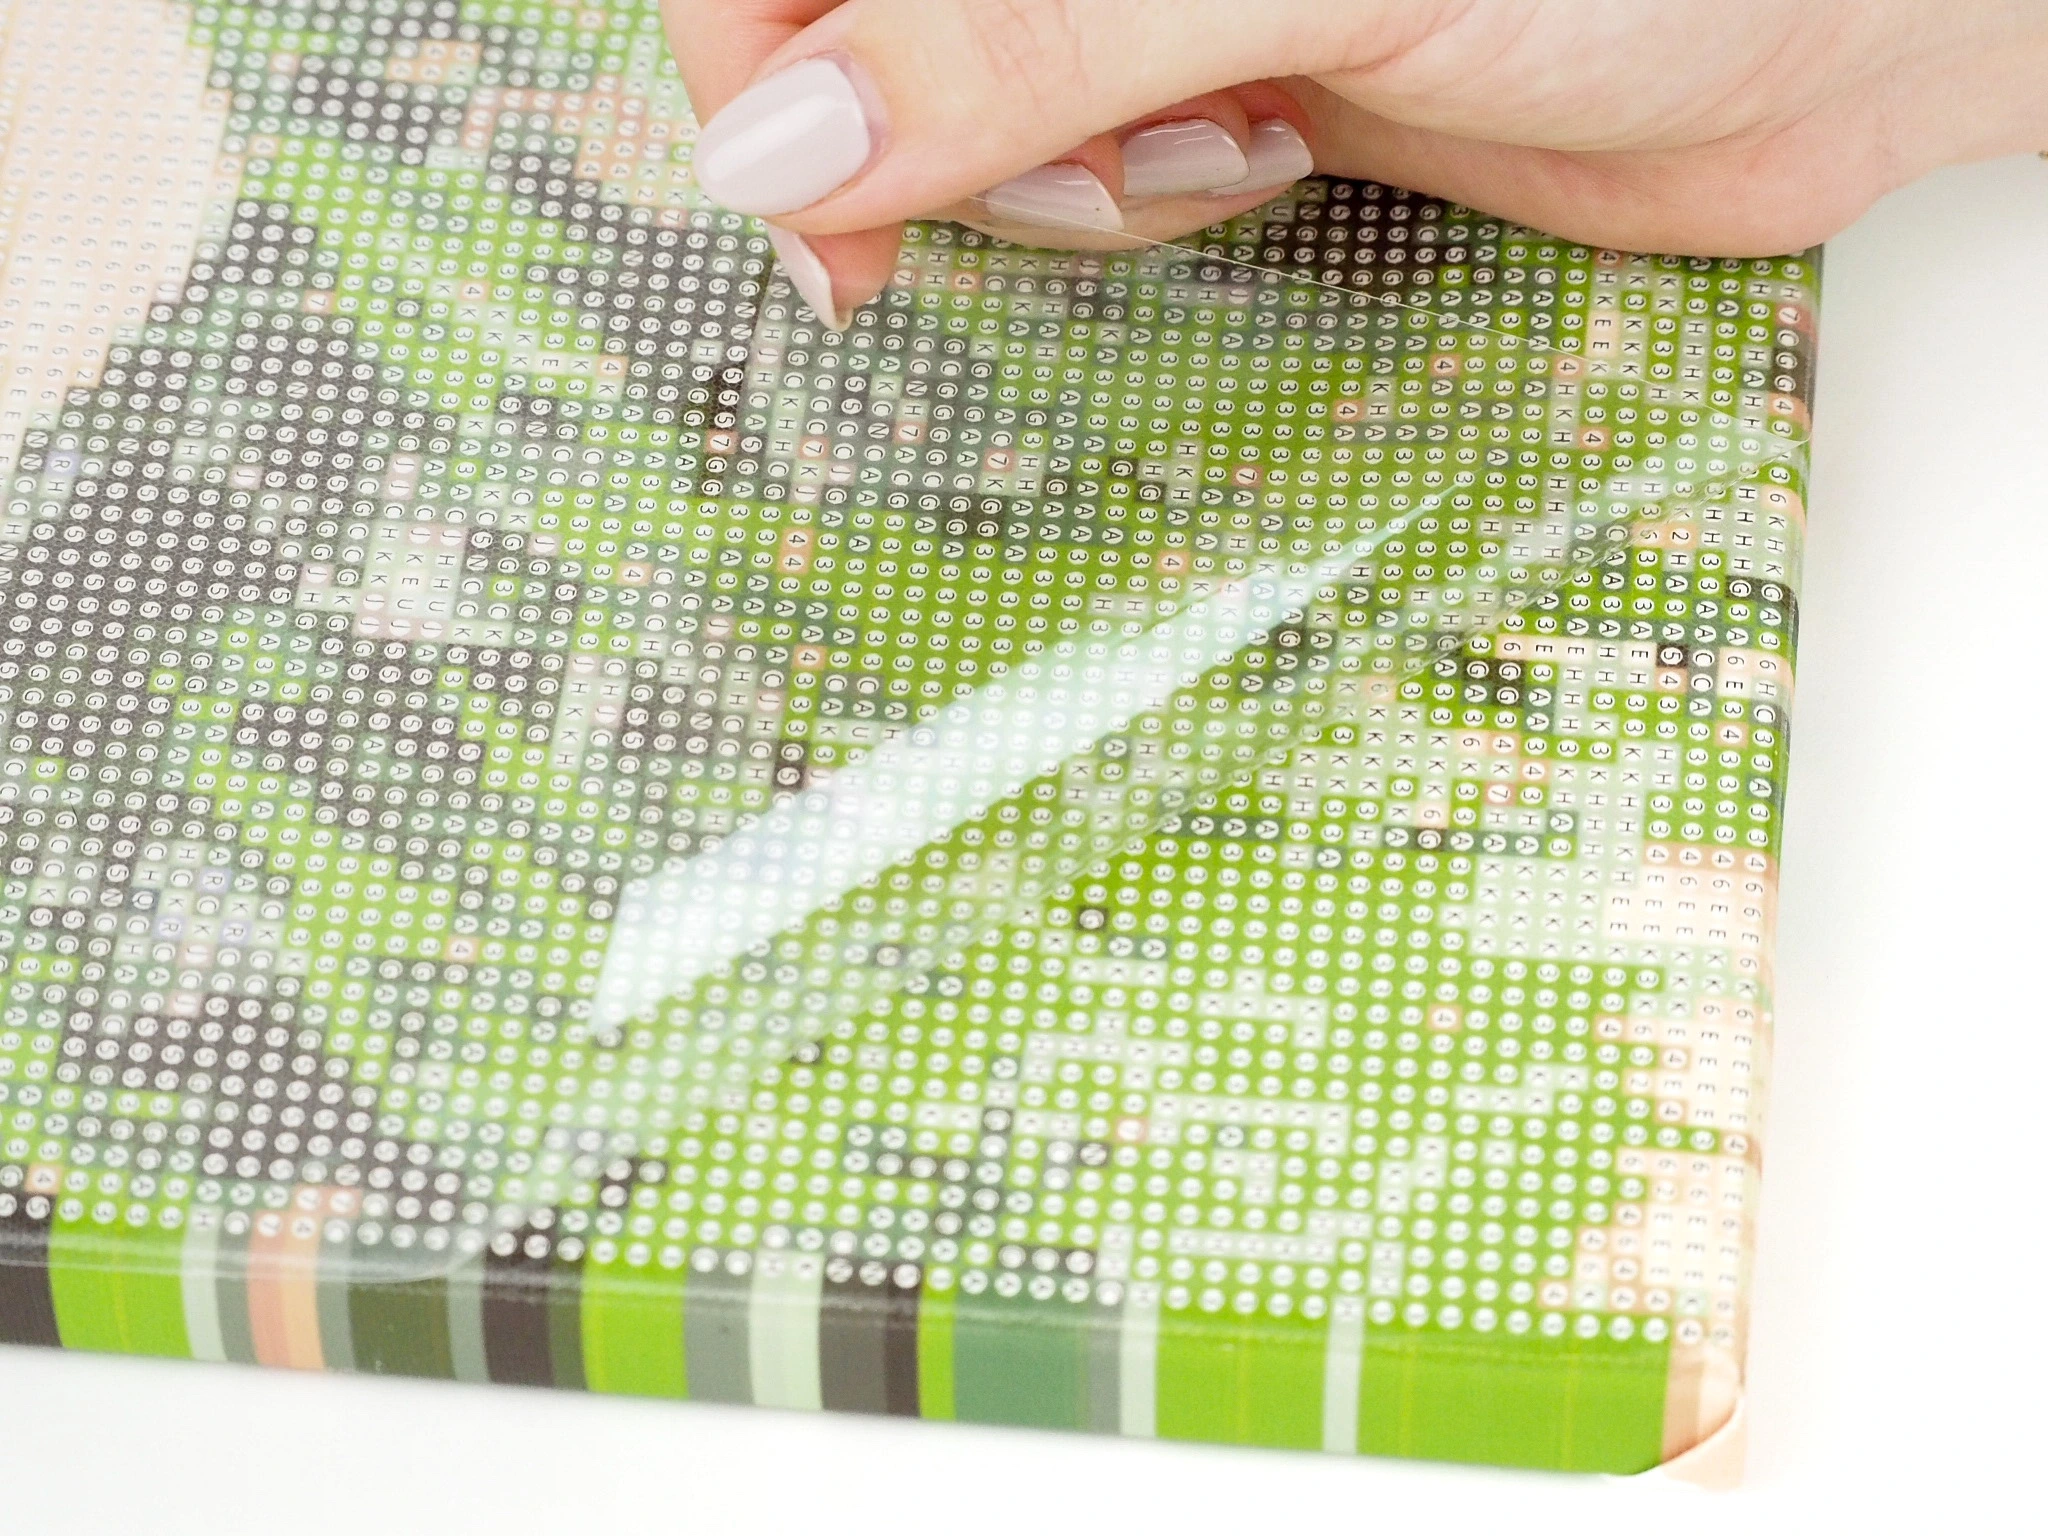
The adhesive canvas is covered with a protective film. Peel back only a small portion, about two to three inches, so the rest of the canvas stays clean and sticky.
To place a drill, dip the applicator pen into the wax, pick up a drill, and press it onto the matching symbol. At first, it may feel slow, but once a rhythm develops, the painting comes together quickly.
Paint With Diamonds Quick Tutorial
Follow these instructions to turn the process into a smooth routine:
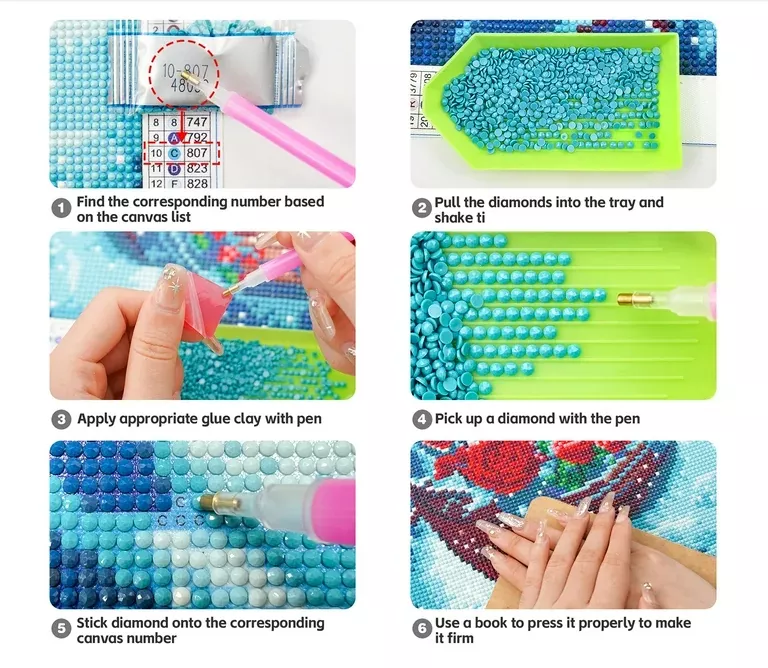
- Match the symbol: Use the canvas legend to find the correct drill number for the area you’re working on.
- Pour & shake: Tip the drills into the tray and give a gentle shake so the flat sides face down and sit in the grooves.
- Load the pen: Press the pen tip into the wax to “charge” it so drills stick to the tip.
- Pick up a drill: Touch the pen to the top of a drill; it will lift cleanly.
- Place on the symbol: Set the drill onto the matching symbol within the small section you’ve uncovered. Light pressure is enough.
- Set the section: After finishing a patch, cover it and press with a book or use a roller to secure the drills before moving on.
Tip: If drills stop picking up easily, reload a tiny bit of wax; if rows look uneven, a quick pass with a ruler or roller straightens everything.
Finding a Steady Rhythm
There are two common approaches to paint with diamonds. Some painters prefer completing the project section by section. This keeps the workspace neat, prevents drills from getting mixed up, and makes it easy to see progress quickly.
Others enjoy working color by color across the entire canvas. This method can feel more efficient if there are large blocks of the same shade, though it does require extra organization to avoid mixing drills.
Whichever approach is chosen, keeping drills aligned in the same direction will make the finished piece sparkle evenly and look polished — a detail that becomes especially noticeable when working on more intricate designs, such as those often found in our New Arrivals.
Helpful Tools and Techniques
Basic kits provide everything required, but a few optional tools can improve the process:
- Light pad: Brightens the canvas, making symbols easier to read.
- Multi-placer tips: Allow several drills to be placed at once, speeding up larger areas.
- Roller or flat tool: Helps press drills evenly and keeps rows straight.
These additions are not essential, but they can make painting smoother and more enjoyable, especially on larger designs.
Completing and Displaying the Artwork
Once the final drill is placed, press the canvas with a roller or heavy book to secure the drills. Some painters also choose to apply a sealant for extra protection, though this step is optional.
Finally, frame the finished paint with diamonds kit. A simple frame not only protects the canvas but also highlights the colors, allowing the artwork to be displayed proudly in any room.