Diamond painting is a fun and rewarding hobby, but it isn’t always perfect right out of the box. Canvases sometimes arrive with wrinkles, drills can clump together, and working through a big block of the same color can test your patience. Thankfully, there are simple ways to handle these issues so you can focus on enjoying the process. Below you’ll find some of the most useful diamond painting tips and tricks to make the whole process smoother and more enjoyable.
How to Remove Wrinkles from a Diamond Painting Canvas
A flat canvas is much easier to work on. Wrinkles won’t ruin the adhesive, but they do make placing drills harder and can affect the final look. Taking a few minutes to smooth things out at the start sets the tone for the whole project, turning it from a small frustration into part of the calming rhythm that makes diamond painting such a rewarding arts hobby.
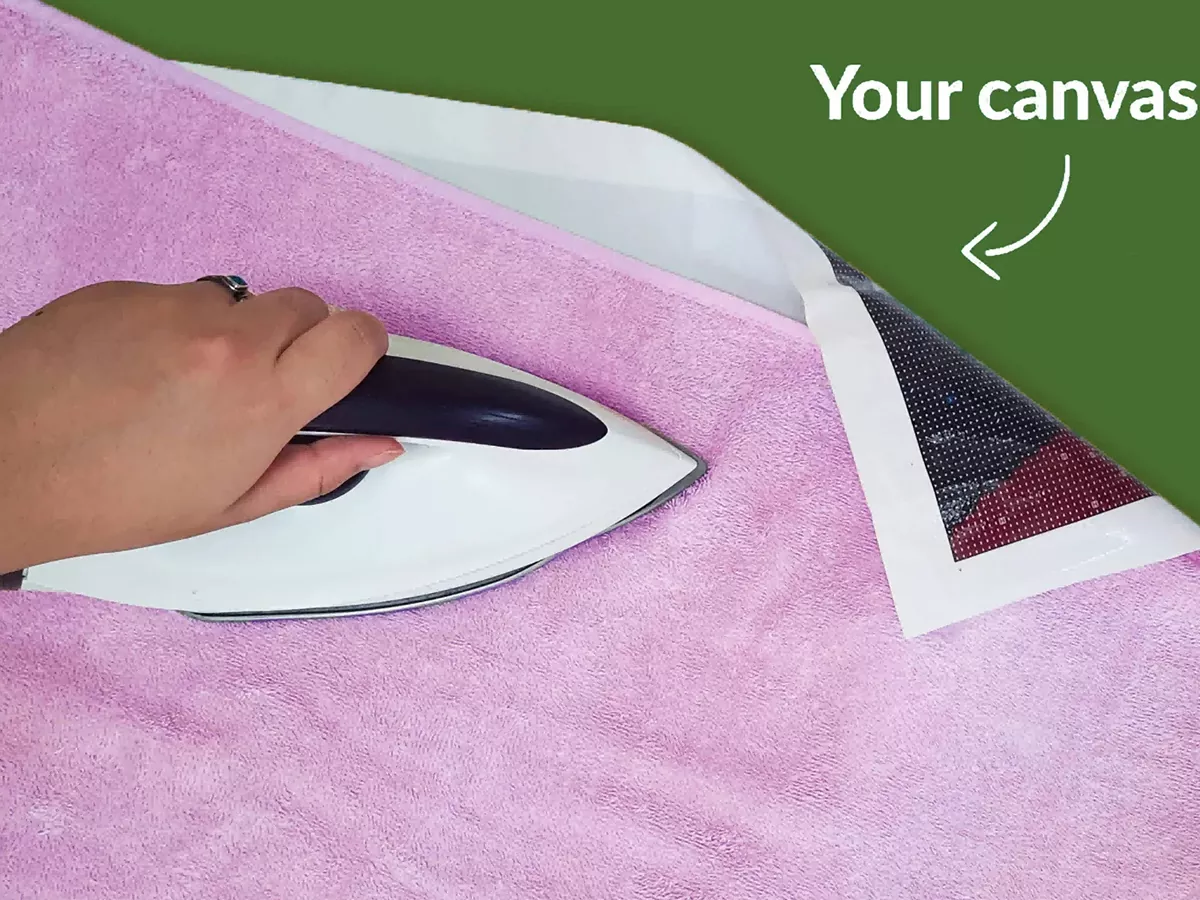
Flat Ironing (Best Method)
Most canvases are made with a cotton or linen blend, which can handle gentle ironing. Place the canvas face down on a thick towel and mist the back lightly with water, just enough to dampen the fabric. Using a medium heat setting, move the iron slowly but steadily across the surface. Don’t let it sit in one spot too long. In just a few passes, the wrinkles will relax and the canvas will be perfectly flat.
Stretch and Roll (Alternative Method)
If you’d rather avoid heat, stretching and rolling works just as well. Lay the canvas face down on a clean surface, mist the back lightly, and gently pull the fabric outward with your hands. A clean rolling pin can also help; roll it across the back with light, even pressure. As the canvas dries, it will flatten naturally.
Diamond Painting Tips and Tricks for a Smoother Experience
Once the canvas is ready, the real fun begins. These diamond painting tips and tricks are simple but make a big difference in how easy and enjoyable the process feels.
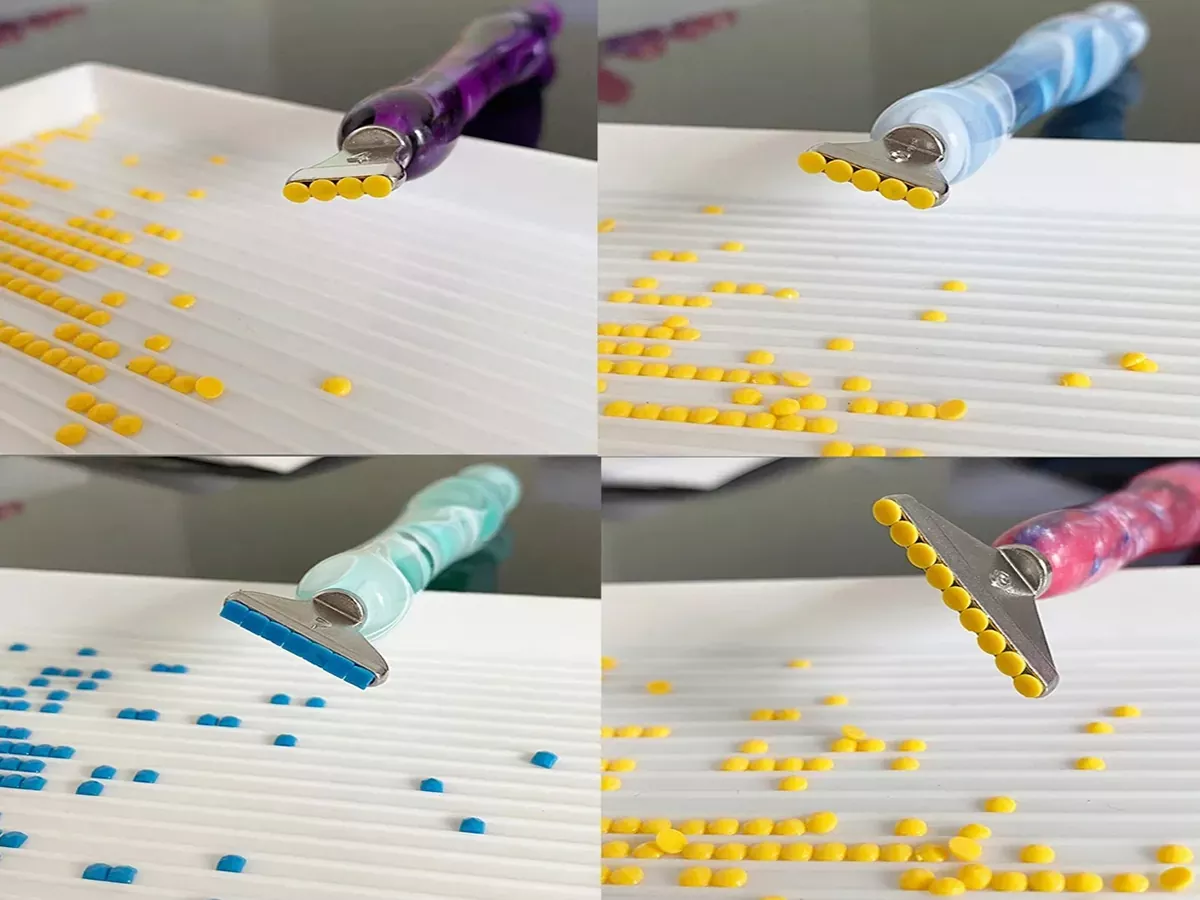
1- Use a Multi-Diamond Applicator Tool
When working on large areas of the same color, a multi-placer (or multi-diamond applicator) can save a lot of time. Instead of placing one drill at a time, the tool lets you pick up and place several in a row. This not only speeds up the process but also keeps lines straighter and sections looking more uniform. Beginners often start with a single placer, but moving to a multi-placer is one of the easiest upgrades for faster, cleaner results.
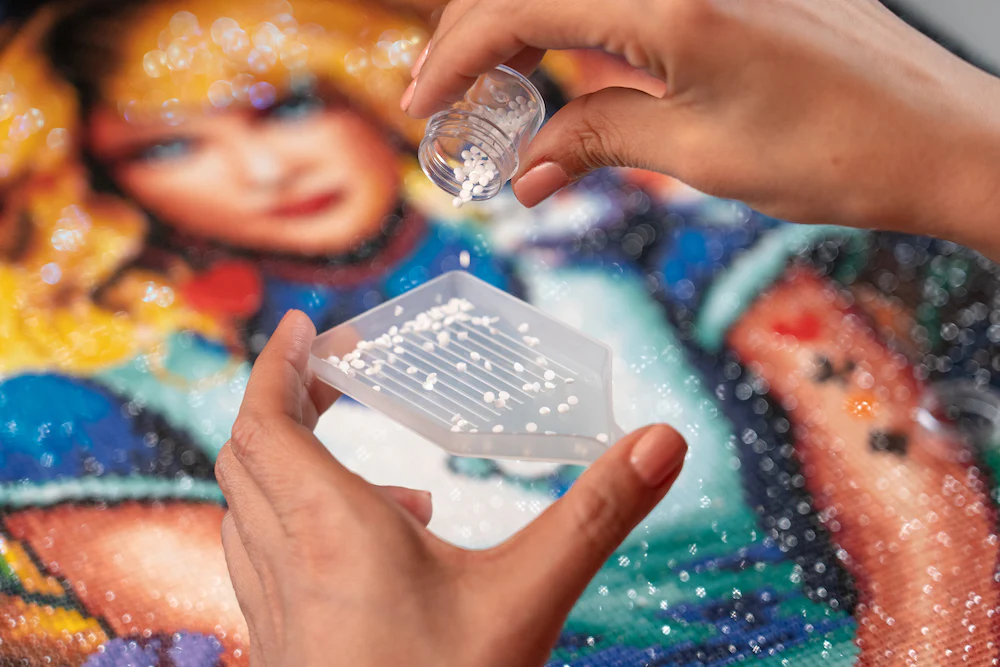
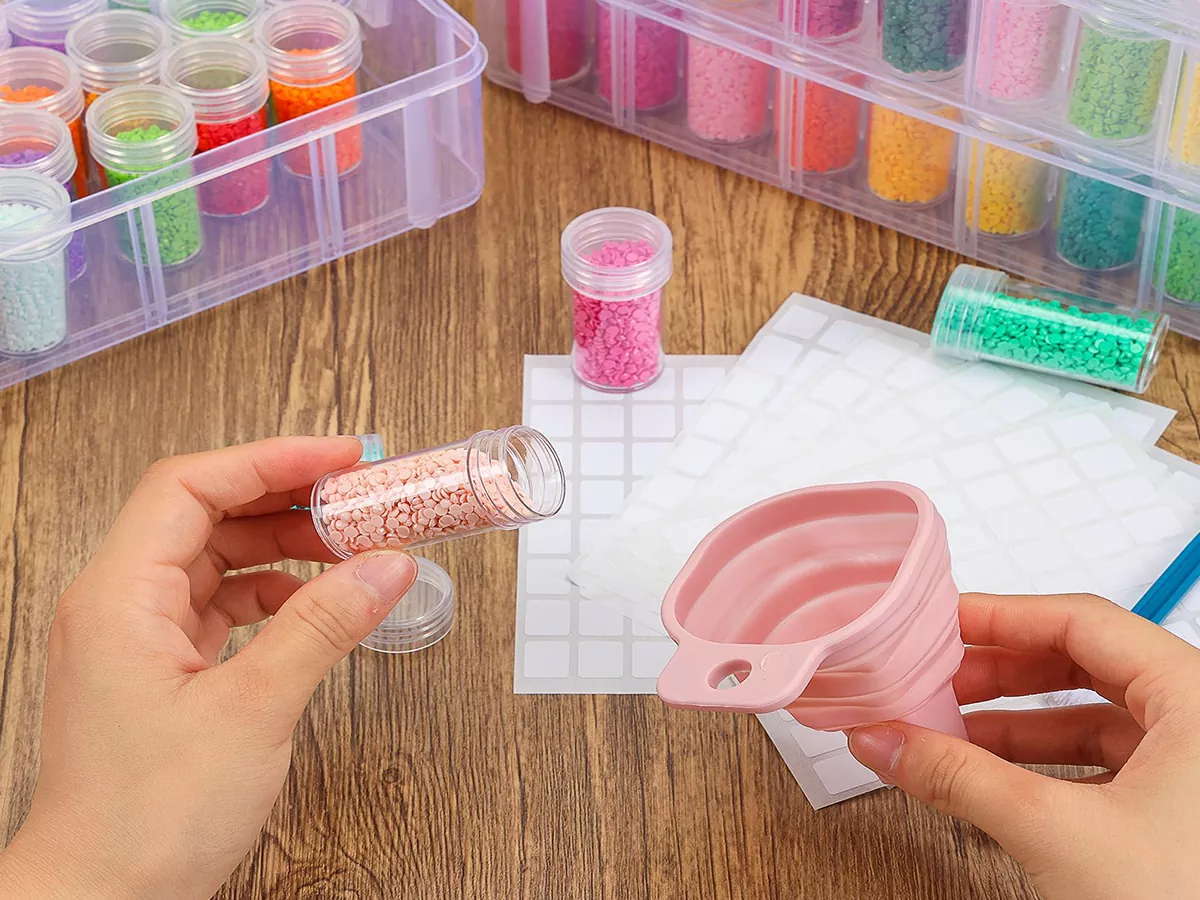
2- Separate Stuck Drills
If drills arrive fused together, don’t waste time trying to pry them apart with your fingers. Place them between two trays and press gently. You’ll hear a little pop as they separate, quick and easy with no damage.

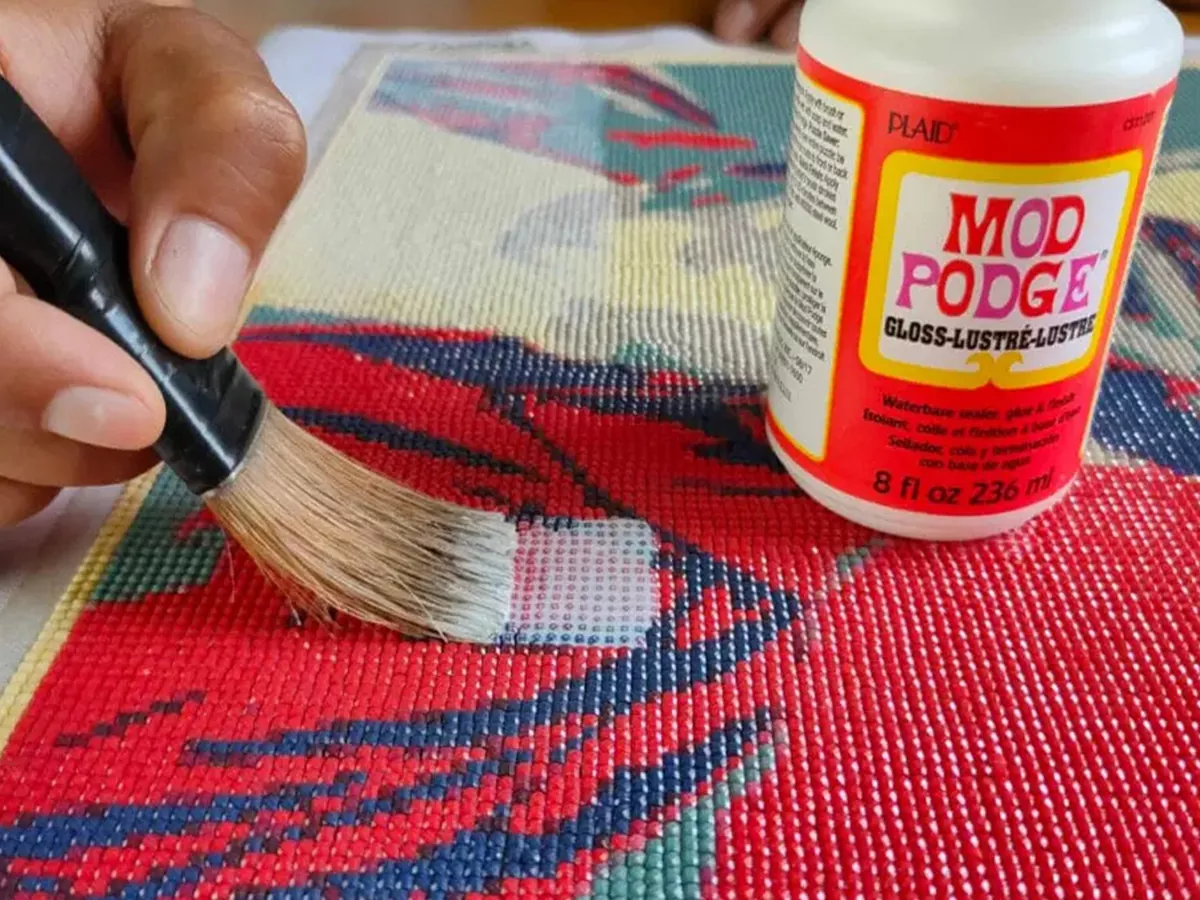
3- Seal the Finished Painting
Once the last drill is in place, think about sealing the canvas. A thin coat of clear sealer will lock everything down and protect the surface from dust or humidity. It’s optional, but it’s a nice way to keep the sparkle looking fresh for years.
4- Store Extra Drills
Most kits include more colorful drills than you’ll actually need. Don’t throw them out; instead, store them in a labeled organizer. Extras are useful if a drill goes missing, if a packet is spilled, or even for future projects.
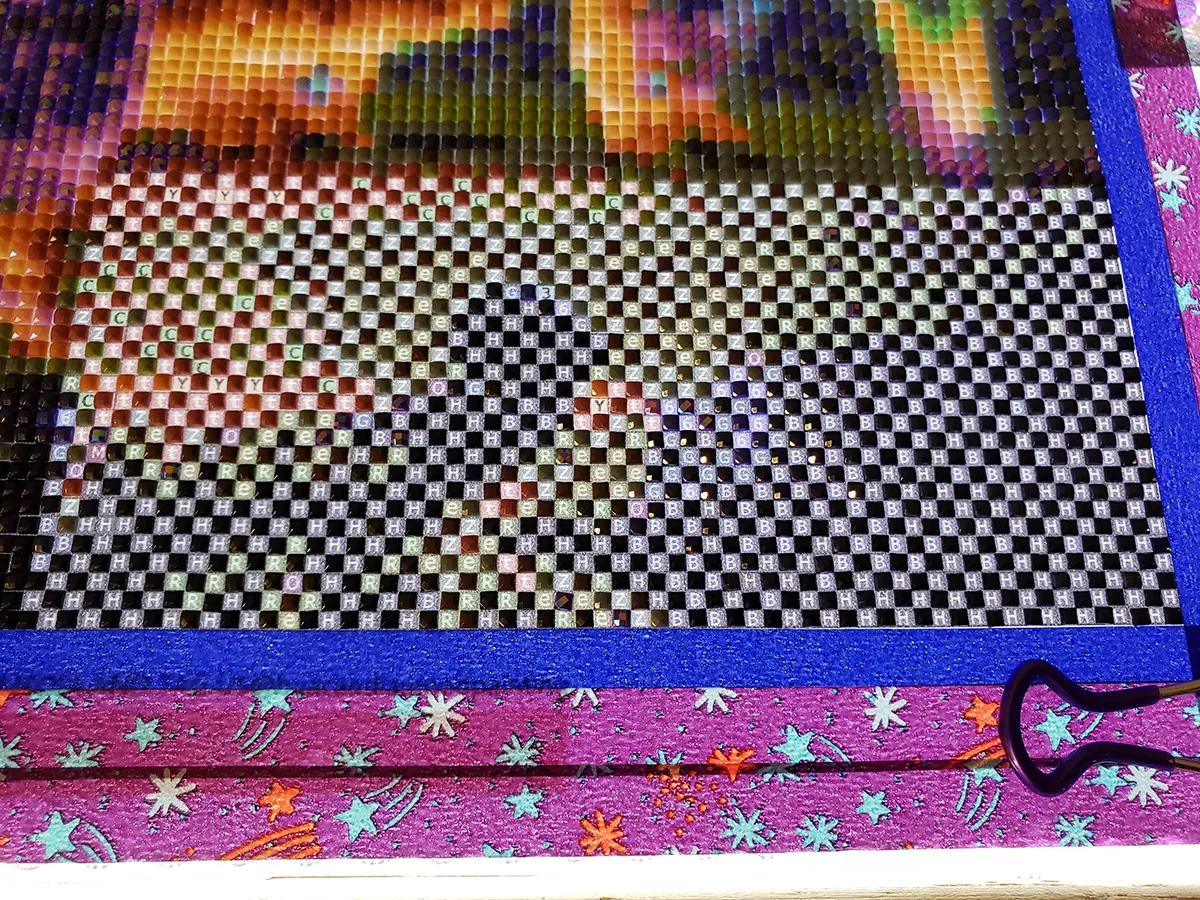
5- Try the Checkerboard Method
Working on a big block of the same color can feel never-ending. The checkerboard method makes it easier: place drills in a grid pattern first, then fill in the gaps. This keeps rows neat and also makes progress feel more satisfying.
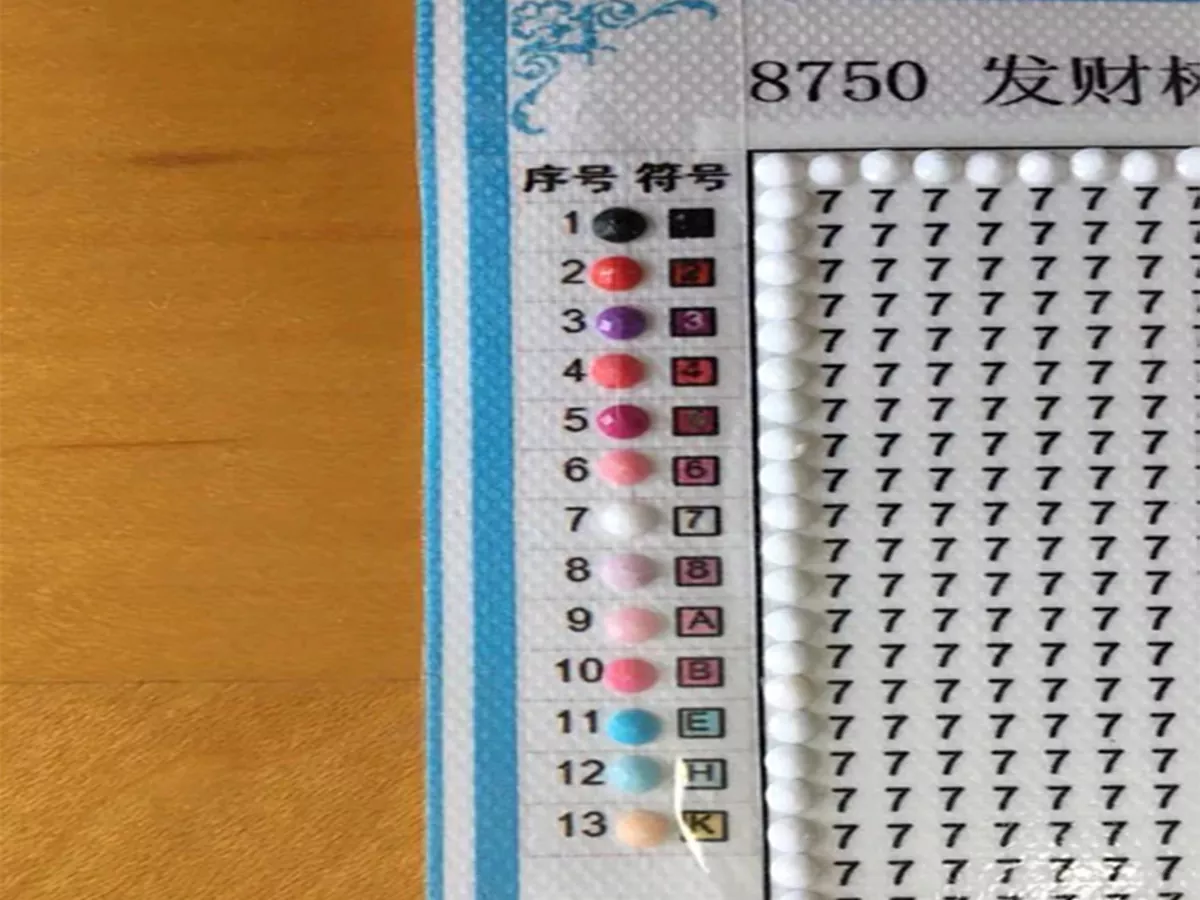
6- Keep Drills Next to Their Symbol
A little prep goes a long way. Glue or tape small samples of drills next to their symbols on the legend. That way, you can match them at a glance instead of searching through bags every time.
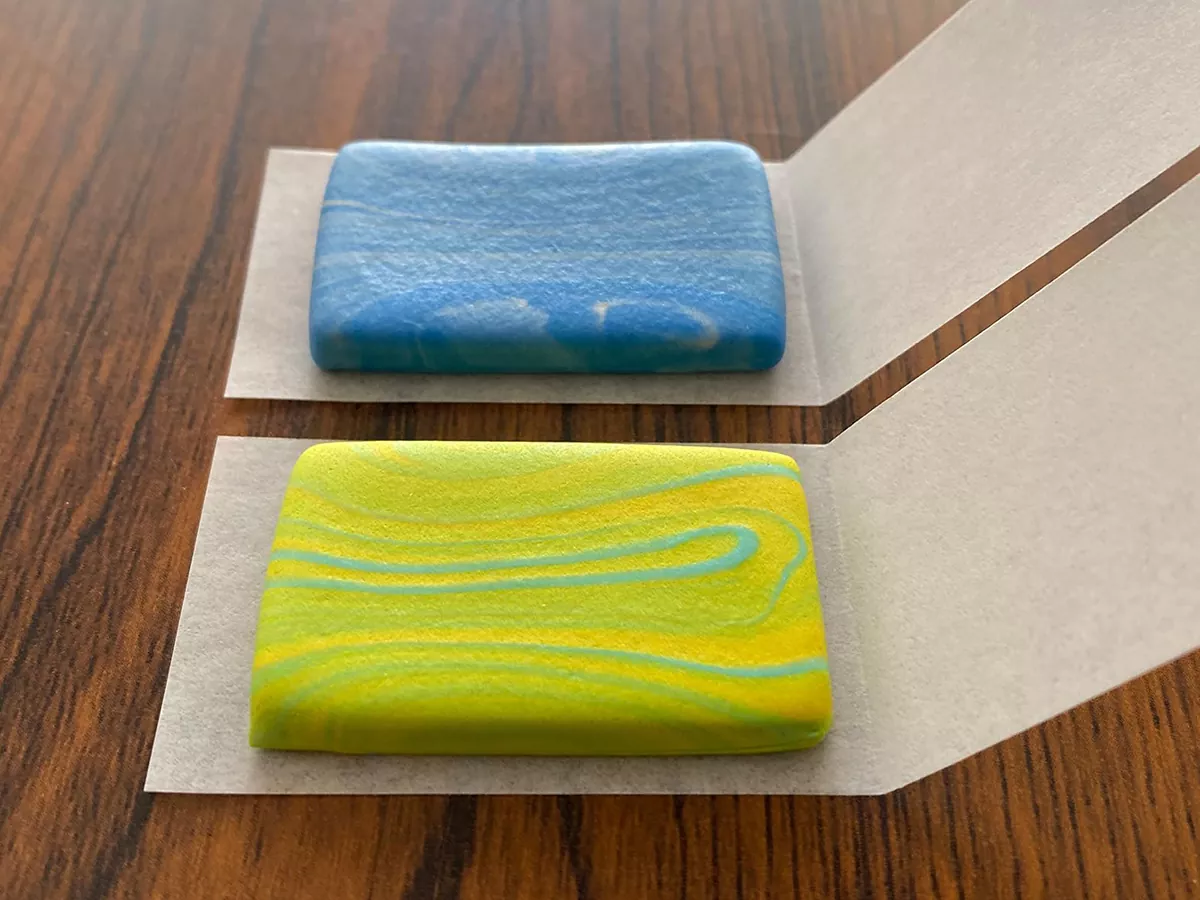
7- Wax Substitutes
The wax that comes with kits doesn’t last forever, and sometimes it runs out before the project is done. Soft putty, reusable adhesive, or even playdough can work in a pinch. They’ll keep the drills sticking to your pen until you restock.
8- Clean the Edges Before Framing
Printed legends and symbols along the edges are helpful while you’re working, but they can look messy in a frame. A cotton pad with a bit of nail polish remover will wipe them away. The result is a clean, professional finish.
Final Thoughts
Diamond painting is supposed to be calming, not stressful. Taking a little time to smooth the canvas, organize drills, and use simple techniques makes a big difference in how the project feels. With these diamond painting tips and tricks, you’ll find the process more enjoyable, and the end result more polished and ready to display proudly.